Master class "Easter eggs made of felt". Felt crafts for Easter: Easter eggs Felt Easter magnets
DIY crafts from felt or viscose napkins for Easter: how to make Easter eggs.
Felt crafts for Easter
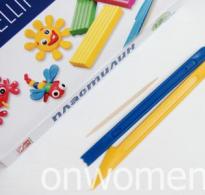
For Easter, you and your children can make various crafts from a variety of materials, including felt. Felt is a fabric that does not require edge processing, because... they don't crumble. Therefore, it is very convenient to sew small figures, toys, and souvenirs from it. If there is no felt, it can be replaced with viscose household napkins, which are sold in supermarkets.

Felt Easter eggs
One of the crafts you can make for Easter with your children is Easter eggs. They can be made voluminous or flat by sewing a wooden skewer or loop inside. You can also make a festive garland or wreath from these eggs.
There are even more design and decoration options. Can be glued or sewn:
- ribbons,
- braid,
- lace,
- strips of felt of a different color,
- felt figures (cut out yourself or ready-made),
- flowers,
- decorative buttons, etc.
Options for making Easter eggs from felt
With glue
Most preschoolers will not be able to cut out the desired figure from felt on their own, because... Felt is a dense material and difficult to cut out of.

Therefore, children can be given felt blanks in the shape of eggs, various materials for decoration and glue. Let them figure out how to decorate the egg. Decorating or decorating is a very creative work, it develops creative thinking and imagination, and working with glue develops fine motor skills.

Using a needle and thread
School-age girls will be able to cut out pieces from felt and sew them together along the edge using a running stitch (a needle-forward stitch) or a buttonhole stitch.
In this case, you must first sew decorations to both parts of the eggs, and then sew them together.
The egg can be left flat or filled with filler (sintepon, holofiber, cotton wool).

Happy creativity! Especially for blog readers "MORE creative ideas for children"(https://site), with sincere respect, Yulia Sherstyuk
All the best! If the article was useful to you, please help the development of the site by sharing a link to it on social networks.
Posting site materials (images and text) on other resources without the written permission of the author is prohibited and punishable by law.
Sewing an Easter egg from felt with your own hands is a great way to plunge into the world of creativity, especially if you are new to this business and your soul demands to create something interesting.
By the way, you can involve toys and little helpers in sewing - they will help you not to get lost in small details, and maybe they will begin to show ingenuity - you will get real collective creativity. The colors of felt and ribbons can be very different - the main thing is that they are combined with each other so that the hand-sewn Easter Egg felt craft looks neat and festive.
For sewing you will need:
- a piece of blue felt 12*12 cm,
- a piece of green felt 6*6 cm,
- a strip of red felt 1 cm thick, 25 cm long,
- threads,
- beads,
- ribbons for decoration,
- filler for crafts,
- needle,
- paper,
- pen.
Before creating a craft, you can collect all kinds of ribbons, beads, beads, threads of different colors, bright buttons, pieces of fabric closer to you, and then, as you go along, figure out what and where to sew. You may also need glue for small parts. 
On a piece of paper, draw the outline of an egg of the desired size, cut it out and attach it to the paper again, now draw stripes and grass, cut them out too. The patterns are ready. 
Now pin the patterns to the felt, you can outline the outline, but it may be visible on the finished craft, so it’s better to do without it. 


Leave a small hole unsewn and fill the craft with filler (sintepon, holofiber) through it. Lightly tamp the filler, but do not overdo it so that the seam does not come apart. 
Sew up the hole and secure the thread. For further decoration, take a floral ribbon and some pink beads, pink thread or one close to this color. 
Sew the floral ribbon to the egg, simultaneously stringing beads onto the thread and sewing it on as well. 
Thread a bright colored ribbon and hang a small one on it. Now a felt Easter egg can come in handy as an original handmade gift. 
If you mix the filler with aromatic dried herbs, you will get an improvised herbal sachet. 


Author: Yulia Smirnykh
At Easter there is a tradition of giving each other eggs as a symbol of the miraculous resurrection of Jesus Christ. Author Nadezhda Bogomolova invites you to sew an egg from felt, which can decorate a holiday table or become an excellent holiday gift.
A felt Easter egg can be decorated with beautiful felt flowers. You can see more ideas for creating Easter eggs from felt.
So, for work you will need:
- felt in yellow, pink, green and purple colors
- needle and thin thread
- stuffing material
How to sew an Easter egg from felt with your own hands, master class
First of all, we need a pattern for the egg, as well as flowers for decoration:
 Egg pattern
 Using the pattern, we cut out the details of the future Easter egg:
- Three parts of the egg itself made of yellow felt.
- Two leaves - a large and a small one made of green felt.
- Five petals made of pink felt.
- Flower core made of purple felt.

We sew three parts of the egg from yellow felt, leaving an unsewn place in order to turn it inside out. Turn the egg right side out and stuff it.

Sew up the egg with a hidden seam.

We collect the flower petals on a thread for assembly.

We tighten the thread. Sew the first and last petals.

We assemble the core of the flower, put a ball of stuffing material inside, and tighten the thread. It turns out to be a ball. Sew the core to the flower, sew on the leaves.

Sew the finished flower to the egg. The felt Easter egg is ready!

Here are some Easter felt ideas:
- For example, if you glue a small piece of magnet to the back of a felt egg, you will get an excellent souvenir in the form of an Easter magnet for the refrigerator.
- If you sew a small piece of ribbon to the top of a felt egg, you will have an interesting Easter pendant or garland to decorate your room.
- Such an egg is a convenient pincushion for needlewomen, if you sew an elastic band on the inside and put such a bracelet on your hand while working.
Easter is not that long before the holiday, so you should take care of souvenirs for your loved ones now. Today we will show you how to sew Easter eggs from felt with your own hands. These funny felt eggs will decorate your interior, giving it a touch of coziness and festive mood! A detailed description with a photo and a pattern will help you in your work.
Tools and materials Time: 1 day Difficulty: 6/10
- a sheet of wool felt of the desired shade;
- floss;
- embroidery needles No. 5 or No. 8;
- pencil;
- scissors;
- self-adhesive non-woven lining (Fabry or another brand);
- template for embroidering an egg (see text below).
Felt Easter eggs are an original and stylish decoration for the Easter table that you can make with your own hands!
These eggs are also a wonderful gift for friends and relatives! Give your closest people one woolen egg each - and, undoubtedly, they will appreciate such a gift!

If you still doubt your capabilities, we hasten to reassure you. Anyone who is at least a little familiar with a sewing needle and thread can make such eggs! And our small recommendations on choosing materials and tools will help you.
So, what do you need to make beautiful felt Easter eggs?
First, you'll need felt. Wool felt is preferable. It sews well, looks cozy, and you can find great colors in their range. You will also need embroidery floss. Use any colors you like (like we used in the first egg, the photo of which you can see above). Or use just one color for a simple, classic egg.

You also need a needle. We used 3 strand floss, so we recommend size 5 or size 8 needles. Plus you will need some soft filler. A bunch of cotton balls will work great in this case. And finally, you will need a template, which you can download below. This template is full-size, so you don't have to do any expansion.
There are also a few extras to help you stitch the best stitches of your life! Fabry's self-adhesive non-woven fabric is great for transferring patterns onto felt (as you will see below), it's easy to use, and the stitches on it are even and beautiful! Such non-woven fabric can be easily purchased at a craft store.
Step-by-step instructions with photos
So let's start sewing felt Easter eggs.
Step 1: Download the pattern
Download the template below with patterns and embroidery for the egg.
Felt Easter eggs - pattern
Step 2: translate patterns
Trace the patterns carefully along all the lines with a pencil on self-adhesive non-woven material.
Cut each piece with a gap of approximately 3-4 mm. Glue the interlining onto the felt.
Step 3: Embroider the design
Next you need to embroider the design. You will sew directly through the stabilizer and felt. We used a combination of the following stitches: back igloo, running stitch, lazy daisy, and French knot. Below we will show you how to make them if you are new to embroidery and these stitches are not familiar to you.
Back stitch
To form this stitch, insert the needle into the fabric from the underside about 0.5 cm from where you want to start sewing. Then insert the needle from the front side to the starting point of sewing and move it from the bottom 1 cm forward. Bring the needle up from the bottom (see picture below).

Running stitch
This is the simplest stitch. Simply insert the needle and thread into the fabric from bottom to top and top to bottom at equal intervals.

Stitch “Lazy daisy”
To form this seam, bring the needle out from the bottom up and immediately insert the needle back into the same place from top to bottom. You should have a loop formed. At some distance, bring the needle up from the bottom, pick up this loop and bring the needle back to the same place.

French knot
Bring the needle up from the bottom. Wind 2 turns of thread onto the needle, then pass the needle to the same place from top to bottom.

For all seams we used 3 strand floss. For this egg we embroidered with white thread using Norwegian blue felt. For the sample above we used straw colored felt.

Repeat the embroidery for all four wedge shapes.
Step 4: Trim along the outline
Once you are done with the embroidery, trim all four pieces neatly along the lines.

Step 5: Remove the interlining
Now you need to soak the stabilizer. To do this, place all the pieces face down in a bowl of cold water and let them sit there for about an hour. The stabilizer will become viscous and soft. Rinse it under cold running water. If any pieces are difficult to separate, simply run them under a strong stream of water and they will come off. Don't rub the surface of the felt - just let the water do its job.

Set the pieces on a towel and let them dry. Do not wring or twist them, even slightly. Just place them wet on a towel and let them dry.
Step 6: Sew the Pieces
Place the two egg pieces together with the embroidery facing up and sew them together along one edge. We used a running stitch with small stitches, which leaves a nice ridge along the seams of the egg. If you want a smoother finish, you can use a finishing stitch to stitch the edges.
Attention: be careful not to mix up the ends of the parts! The front of each piece is longer and thinner, while the back end is shorter and not as sharp.

Repeat for the second pair of pieces.
Step 7: Sew the Egg
Sew both pieces together, making sure the ends are positioned correctly. Leave 4-5 cm of the last seam open for stuffing.
The easiest way to sew an egg is if you roll it into the shape of a deflated football.

Add soft stuffing to the craft, then carefully sew up the hole.
Hand-sewn soft Easter eggs made of felt! We hope you enjoyed this tutorial? Check out our website for other Easter-themed master classes.
Our bonus video will also give you some ideas on how to make and decorate felt Easter eggs.
This little Easter egg bag made from felt is a great idea for a unique way to give kids a sweet Easter gift. Our step-by-step master class with photos will help you do it.
These can be done in kindergarten and elementary school. Even a child can make an Easter egg from felt with his own hands if you prepare templates for the craft. A child can give these cute bags filled with sweets to his family, friends or classmates for Easter.
Crafts for Easter: Easter egg-bag made of felt for a sweet gift
You will need:
- Easter egg template (see below)
- Thick thread
- Google eyes
- Orange stickers cut into small triangles
- Scissors
- Lollipops
How to make a craft for Easter

Step 1. Download and print this Easter Egg template from the link. Make sure your printer is set to print at 100% so you print the correct size templates to fit the felt squares.
Step 2. Then take two felt squares and cut out the eggs to fit the template. Select one egg to "open." Cut it with a zig-zag as shown in the photo.

Step 3. Then take a needle and thread. Using large stitches, sew the opening part of the egg to the whole part. This will be your handbag.

Step 4. To decorate your felt Easter egg a little, tie a string in the center with a bow. Feel free to add decorations - patterns of felt of a different color, ribbons, rhinestones, etc. to give the egg a festive look!

Step 5. Can Easter eggs be complete without little chicks?! So take some lollipops and glue on little triangular beaks and Googly eyes. How cute they look, don't they? By the way, you can make it according to our recipes!

Step 6. All that remains is to place these chickens in felt Easter eggs. A bag with a sweet Easter gift for children is ready!